Space Managers
Space Managers are the heart of the room approval process and help the university effectively manage space on campus. Space Managers are responsible for processing requests for spaces they manage (typically within one business day). They are also responsible for reporting both maintenance and room feature changes to their department’s Power User.
Visit our How-To and FAQ pages for help with performing common tasks using the EMS Client.
EMS Client Installation & Help🔗
Contact your area’s EMS Advisory Team Member to request an account and training. Please email the Chair of the EMS Leadership Team if you need assistance identifying your area’s EMS Advisory Team Member.
Mac Users: EMS is a Windows-only app. Please visit our EMS Client on your Mac webpage for instructions concerning how to install EMS.
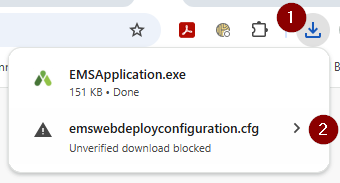
- Click the link (WFU log in required) on the EMS Desktop Client Installation Page. You will be prompted to save two files (EMSApplication.exe and emswebdeployconfiguration.cfg). Save both files in the same location (e.g., your Desktop).
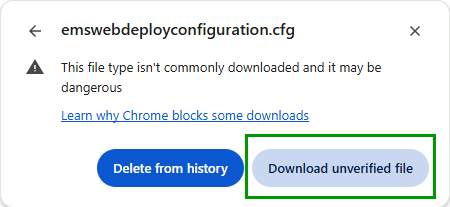
- If you’re a Chrome user, please verify that all files downloaded properly. If not, please follow the steps below.
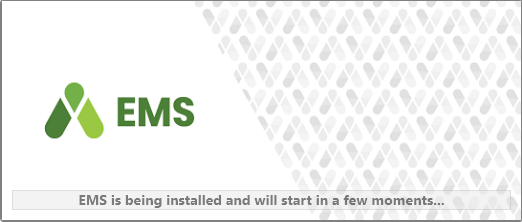
- Double-click the EMS Client Installer (EMSApplication.exe).

💡️ Note: If a window pops up prompting for the “EMS Web Deploy configuration URL” or the “AppFacade Server URL”, paste the text below in the input box and click OK.https://rooms.wfu.edu/EmsDesktopWebDeploy/
💡️If your EMS client is having trouble upgrading (after following all the above steps) please uninstall EMS and try again. - The EMS Client will begin installing, which will take a few minutes.
- Once the installer finishes, the EMS Client will start.
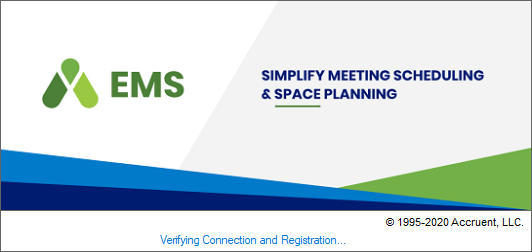
- When prompted, enter your email address and password.
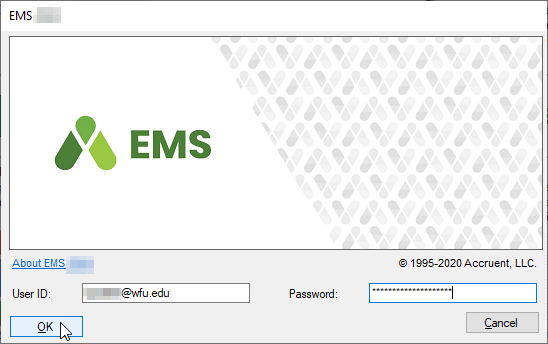
- Once logged in, you’ll see the EMS Desktop Client (your screen may vary slightly).

- To avoid future confusion, we recommend deleting the two files you downloaded in the first step (EMSApplication.exe and emswebdeployconfiguration.cfg).
For additional assistance, please contact your area’s EMS Advisory Team Member.
Uninstalling the EMS Client🔗
Uninstall the EMS Client if you’re unable to get the log in window to appear.
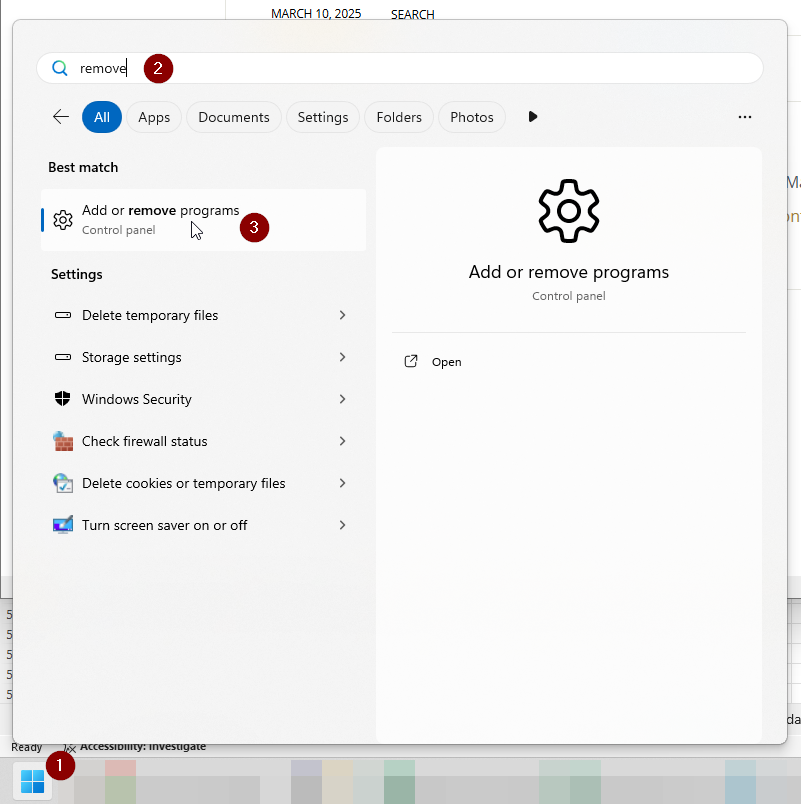
- Click the Start Button, type “remove”, and select “Add or remove programs”.
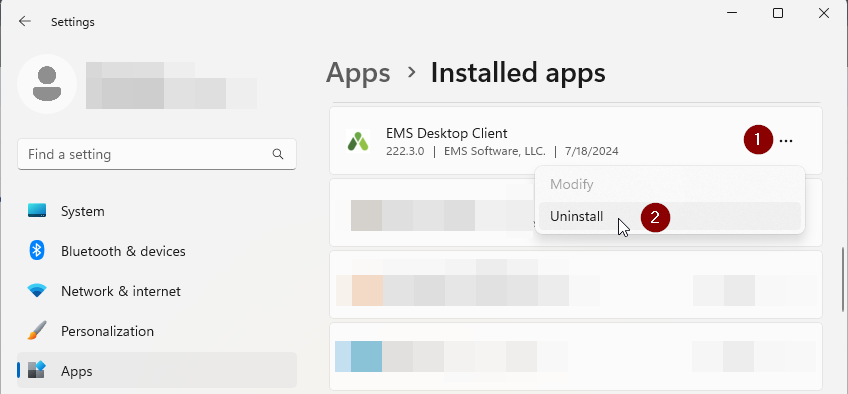
- The “Installed Apps” Window will appear. Scroll down to “EMS Desktop Client”, click the sub-Menu icon, and then select “Uninstall”.
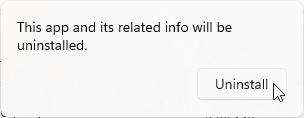
- Click the Uninstall button when prompted. Click the “Yes” button prompted.
- Important: Reboot your computer
- Now you should be able to install EMS.
Navigation
EMS Advisory & Leadership Team
Related Links
DeaconSpace – request a room or space
Library – A/V equipment rental (projectors, speakers, mics, and more)